OneDigitDisplay
I2C interface for 7 segment LCD
Con One Digit Display puoi controllare questi LCD a 7 segmenti dall'aspetto un po' vintage tramite protocollo I2C, quindi con solo due fili!
Grazie ai …
Con One Digit Display puoi controllare questi LCD a 7 segmenti dall'aspetto un po' vintage tramite protocollo I2C, quindi con solo due fili!
Grazie ai Led RGB potrai creare fantastici giochi di luce e collegando in serie piu' display potrai creare un orologio o un termometro e pilotarlo con la tua scheda Arduino preferita.
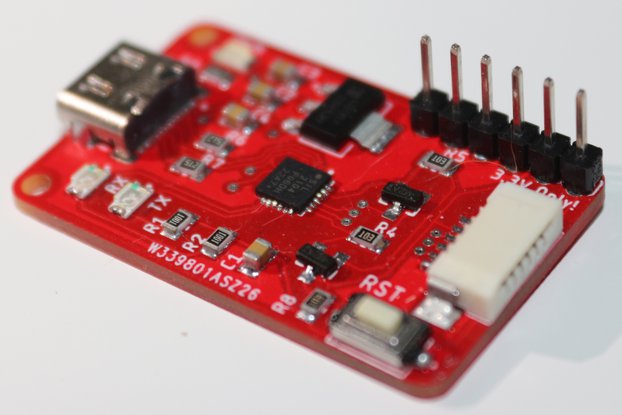
Il modulo è basato su Atmega328P con quarzo esterno da 16 MHz e lavora a 5V. Tramite la porta ICSP è possibile modificare o aggiornare il firmware. Ecco il mio programmatore ICSP
I2C COMMAND
Ecco la lista completa dei comandi.
First byte
Second byte
Symbol
32
0
Space
48
(0 or 1)
0
49
(0 or 1)
1
51
(0 or 1)
2
50
(0 or 1)
3
52
(0 or 1)
4
53
(0 or 1)
5
54
(0 or 1)
6
55
(0 or 1)
7
56
(0 or 1)
8
57
(0 or 1)
9
10
0
Erase
46
0
.
45
(0 or 1)
-
20
(0 or 1)
˚
65
(0 or 1)
A
98
(0 or 1)
b
99
(0 or 1)
c
67
(0 or 1)
C
100
(0 or 1)
d
69
(0 or 1)
E
70
(0 or 1)
F
72
(0 or 1)
H
73
(0 or 1)
I
76
(0 or 1)
L
79
(0 or 1)
O
80
(0 or 1)
P
83
(0 or 1)
S
85
(0 or 1)
U
117
(0 or 1)
u
27
(0 or 1)
Segment a
28
(0 or 1)
Segment b
29
(0 or 1)
Segment c
30
(0 or 1)
Segment d
31
(0 or 1)
Segment e
40
(0 or 1)
Segment f
33
(0 or 1)
Segment g
34
(1 to 7)
DP blink and speed
35
(0 or 1)
DP stop
36
(0 to 255)
Background color HSV
37
(0 to 255)
Backlight brightness
38
(0 to 255)
Rainbow effec, default speed 0
39
0
Erase all
Ogni comando è formato da due Byte, il primo indica la funzione da eseguire e il secondo è un parametro che cambia a seconda della funzione.
Nel di comnadi che stampano caratteri o numeri il parametro puo valere 0o 1, 1 attiverà anche il DP 0 no.
I comandi per stampare i caratteri in oltre seguono il codice ASCII.
address = 0
command[0] = 65;
command[1] = 1;
Wire.beginTransmission(address);
Wire.write(command, sizeof command);
Wire.endTransmission();
L'esempio sopra stamperà la lettera "A" e accenderà il DP del display con indirizzo 0.
Il comando 10 (erase) pulisce il display ma lascia attive le altre fuzioni tiopo retroilluminazione ecc. Non necessita di parametri aggiuntivi.
Il comando 34 (DP blink) farà lampeggiare il DP con una velocità compresa tra 100 ms e 2s
Secon Byte
Velocità
0
100ms
1
200ms
2
300ms
3
400ms
4
500ms
5
1000ms
6
1500ms
7
2000ms
Esempio:
address = 0
command[0] = 34;
command[1] = 4;
Wire.beginTransmission(address);
Wire.write(command, sizeof command);
Wire.endTransmission();
Il comando 35 (DP stop) blocca il lampeggio del DP e col secondo Byte si puo' decidere se tenerlo acceso o spento.
Il comando 36 serve per cambiare il colore della retroilluminazone tramite il parametro che va da 0 a 255
Il comando 37 serve per cambiare la luminosità il parametro che va da 0 a 255
Il comando 38 (rainbow) avvia un effetto di colori casuali che cambiano piu' o meno velocemente in base al secondo Byte. Per interrompere l'effetto basta cambiare colore o con il comando erase_all.
Il comando 39 fa quello che fa erase ma questa volta blocca anche tutte le funzioni attive come DP blink o rainbow
Il comando 46 mostra il DP, non necessita di parametri.
I2C ADDRESS
Per assegnare l'indirizzo al display sul retro del modulo ci sono 3 dip switch quindi 8 indirizzi possibili, assicurati di dare l'indirizzo desiderato prima di alimentare la scheda.
Nel caso hai bisogno di cambiare indirizzo assicurati di spegnere e riaccendere la schheda dopo averlo cambiato.
By clicking Register, you confirm that you accept our Terms & Conditions
What is a Tindarian?
We recognize our top users by making them a Tindarian. Tindarians have access to secret & unreleased features.
How does one become a Tindarian?
We look for the most active & best members of the Tindie community, and invite them to join. There isn't a selection process or form to fill out. The only way to become a Tindarian is by being a nice & active member of the Tindie community!
/i/045073/products/2023-10-11T11%3A53%3A12.599Z-IMG_3560.JPG?1697000303)


